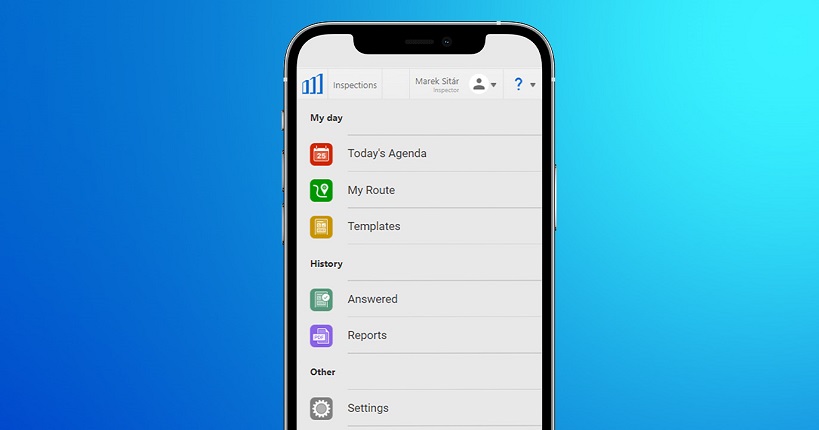
Productivity, business agility, and customer satisfaction can be significantly improved with Resco Inspections+.
You can enable your field workers to collect data and perform their tasks faster and error-free using guided workflows everywhere, even offline.
This article will show you how to start a free trial to experience Inspections+ in a few minutes.
Table of contents:
- Starting Inspections+ trial
- Getting Inspections+ app
- Basic operation of Inspections+
- Step 1. Create a checklist
- Step 2. Answer the checklist
- Step 3. Check the results of the answered checklist
Starting Inspections+ trial
Access the Inspections+ trial request form.
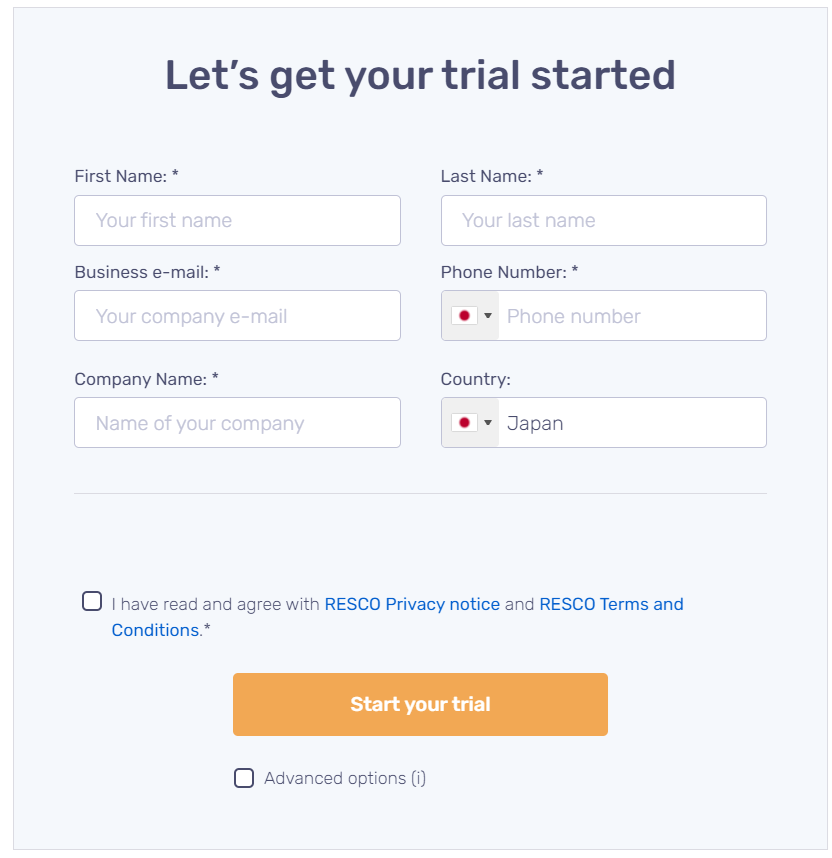
Enter the following information:
- First Name, Last Name: Enter your name. This name will be the login username in the trial environment.
- Business e-mail, Phone Number: Enter a valid e-mail address and phone number. You will receive a confirmation email after the trial environment is acquired.
- Company Name: Enter your company name. This name will be used as the name of the trial environment.
- Country: Select your country of residence.
- “I have read and agree with RESCO Privacy Notice and RESCO Terms and Conditions.” check box: Read the RESCO Privacy Notice and RESCO Terms of Conditions and check the box.
- Advanced options: If checked, you can choose the location of the server (Europe or USA). You can also skip this step without checking the box.
After entering all the information, click the ‘Start your trial’ button. Setup of the trial environment will begin.
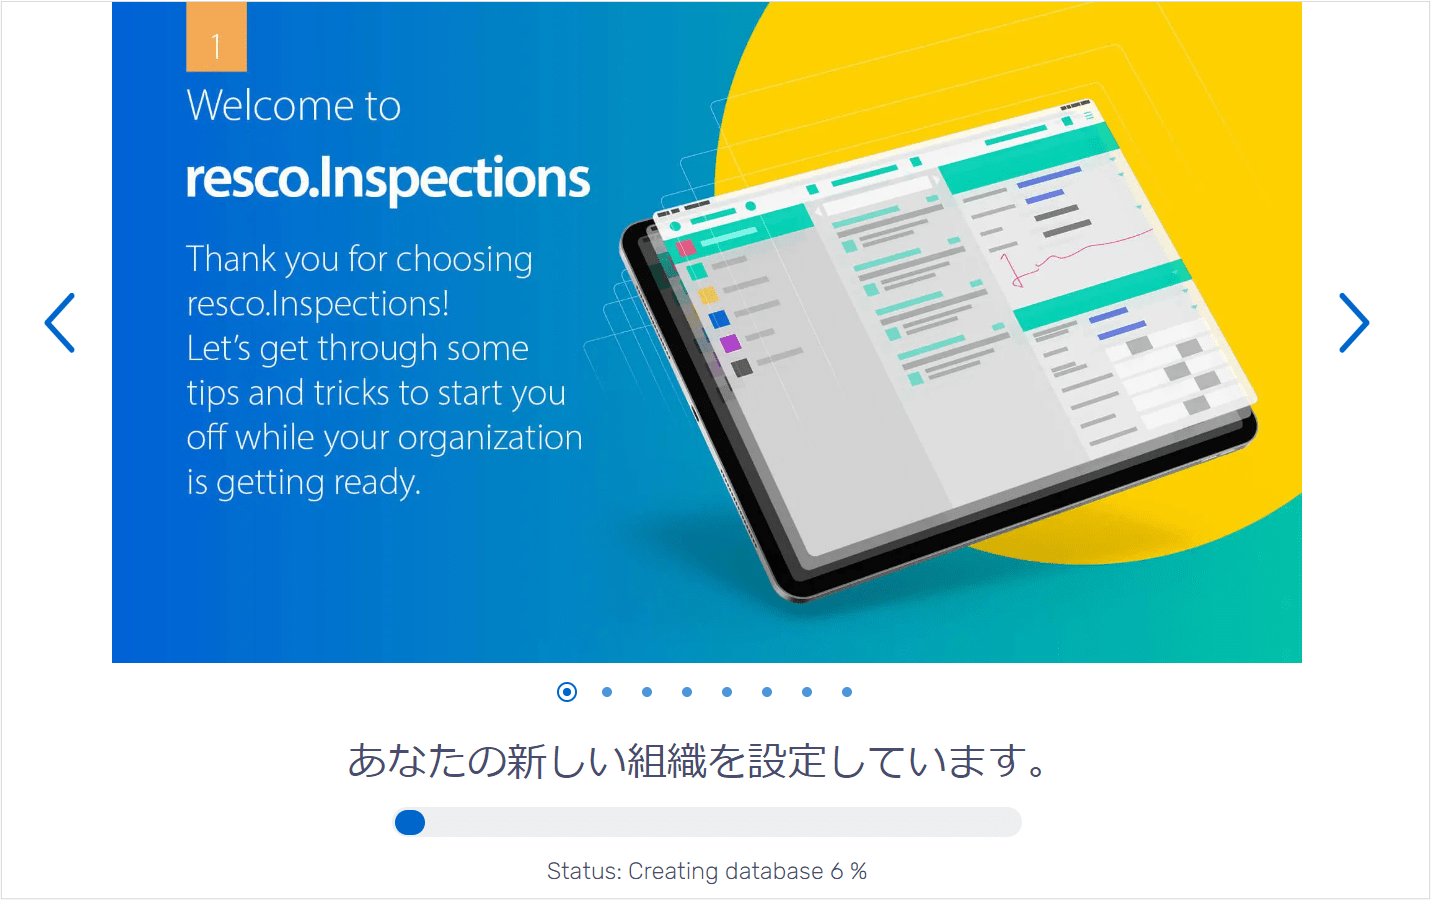
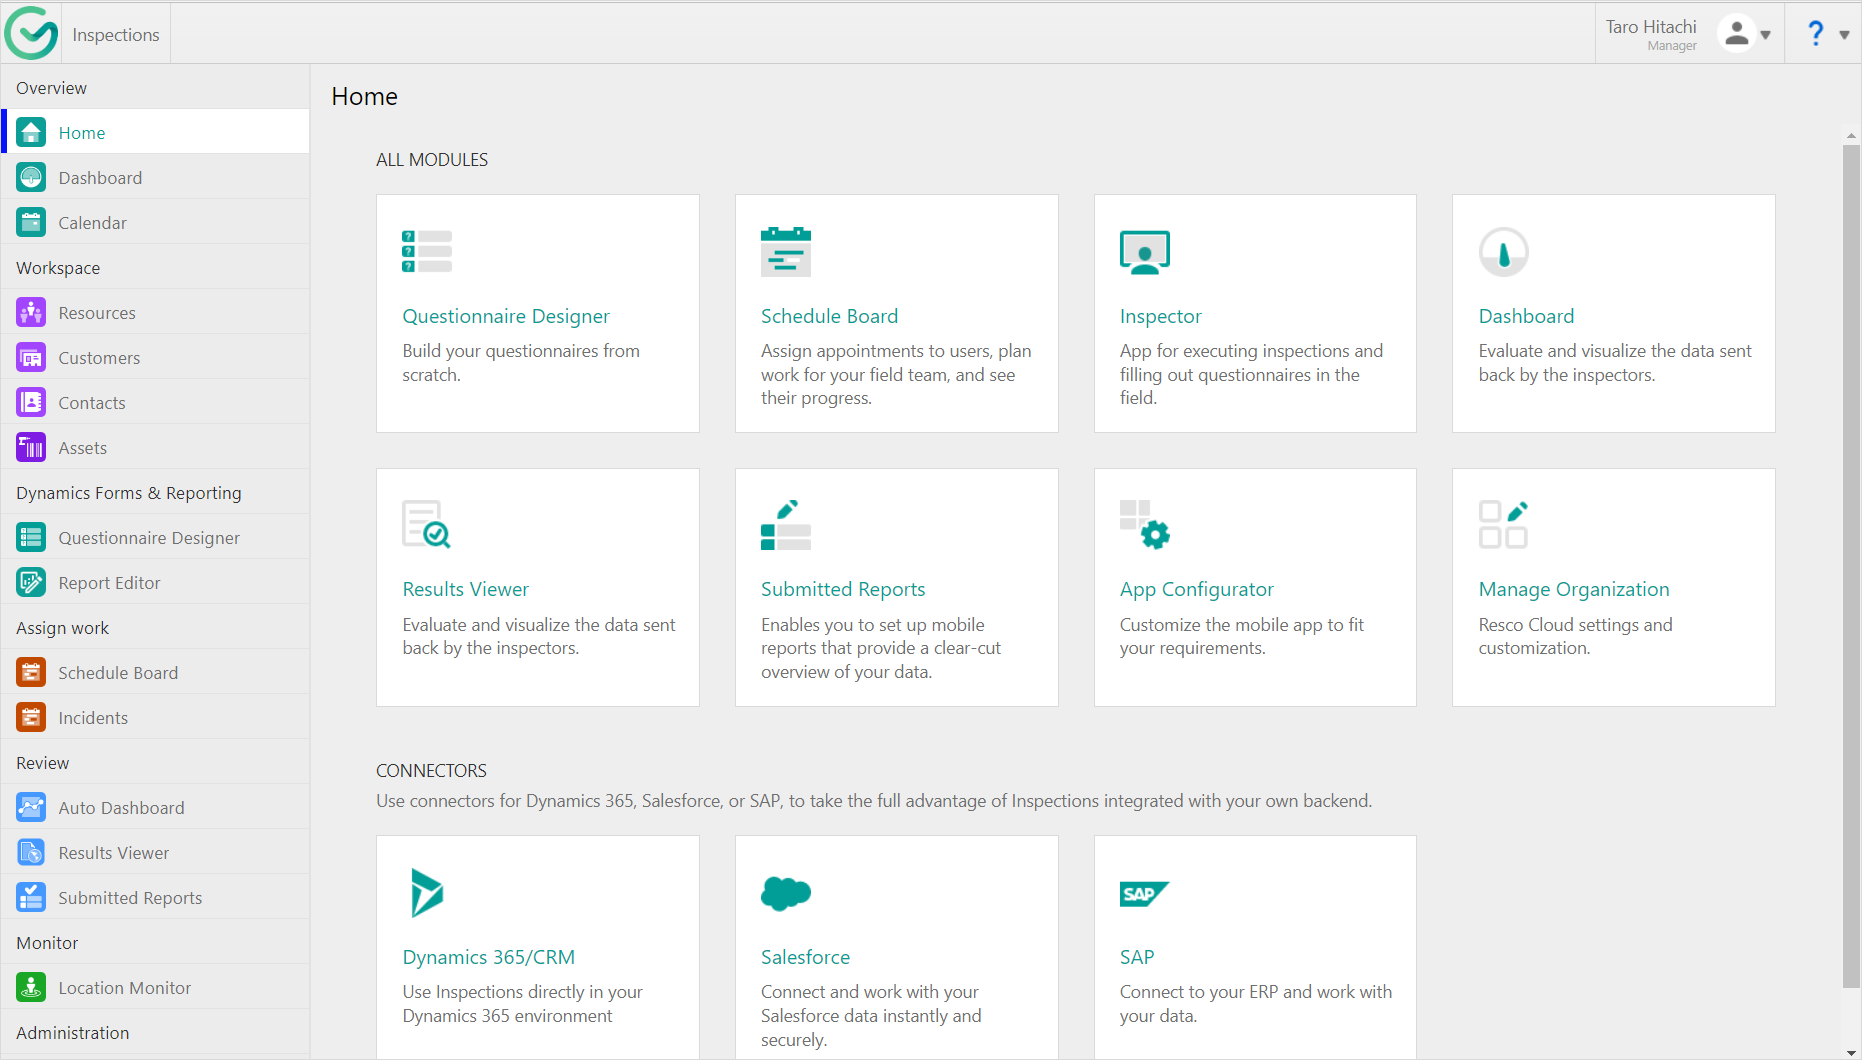
After waiting a few minutes, you will be taken to the main screen of Inspections+. From this screen, you can access all functions of Inspections+.
At the same time, you will receive an email confirming the completion of the trial environment creation. The following login information will be included in the email.
- URL of the trial environment, Organization (organization name of the trial environment), Username, E-mail
Click the ‘Start here’ button in the email and set a password to log in to the trial environment.
Click ‘Reset Password’ and wait a few seconds, then you will be redirected to the main screen of resco.Inspections.
This completes the setup of the trial environment.
Getting Inspections+ app
The next time you access the trial environment, go to the URL provided in the email and log in with your username (email address) and password.
Next, install the mobile app to connect to Resco from your mobile device.
The following platforms are supported:
- iOS10+
- Android 5+
- Windows 10+
- Wear OS 2.0+
Click the links above to find the app.
Or access the app store for your device, search for “Resco Inspections” and install the app.
Basic operation of Inspections+
Step 1. Create a checklist
In Inspections+, you can easily create a checklist using the Questionnaire Designer.
First, access the Inspections+ trial environment and open the Questionnaire Designer.
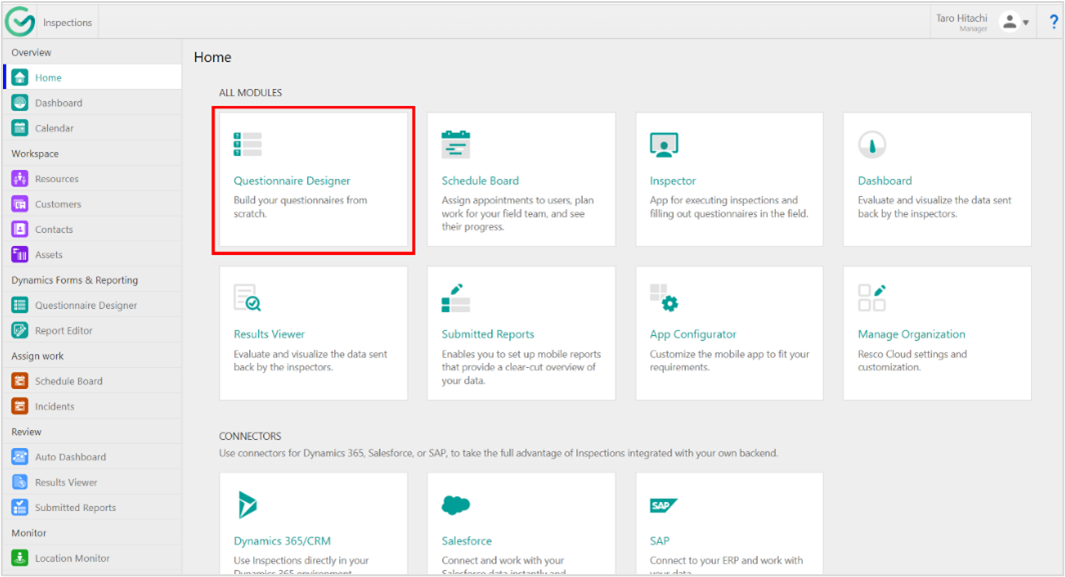
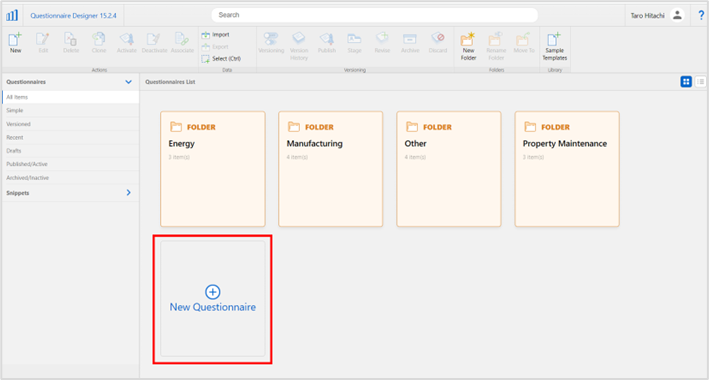
You will be redirected to the Questionnaire Designer screen. You can create and edit checklists in this screen.
A sample checklist is placed in the center of the screen.
Let’s create a simple checklist.
Click ‘New Questionnaire’.
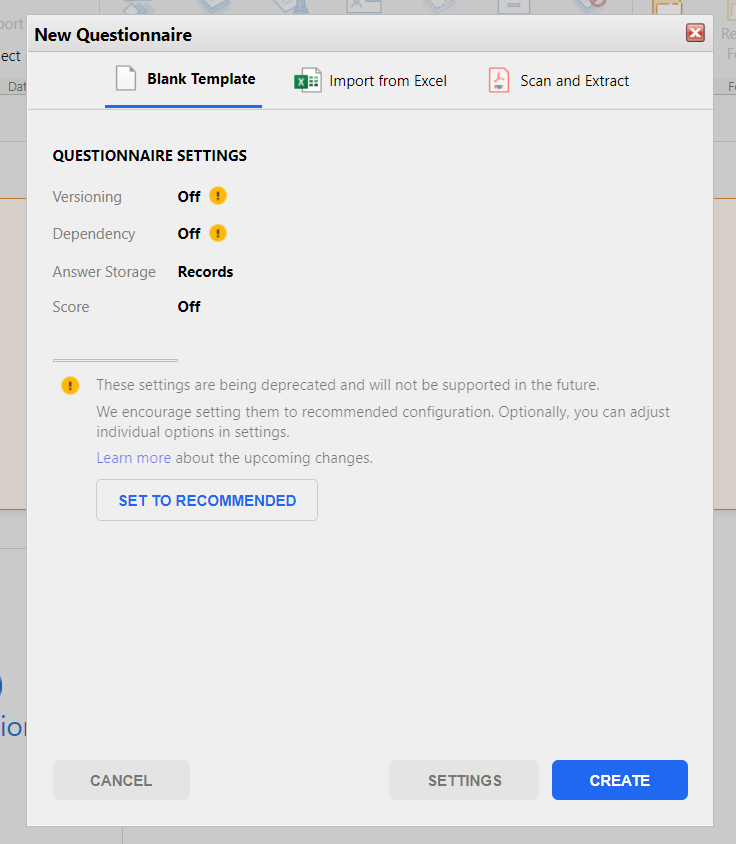
A wizard will open for the initial setup of the new checklist. Here, leave the default values unchanged and click ‘CREATE’ in the lower right corner.
The checklist edit screen will open.
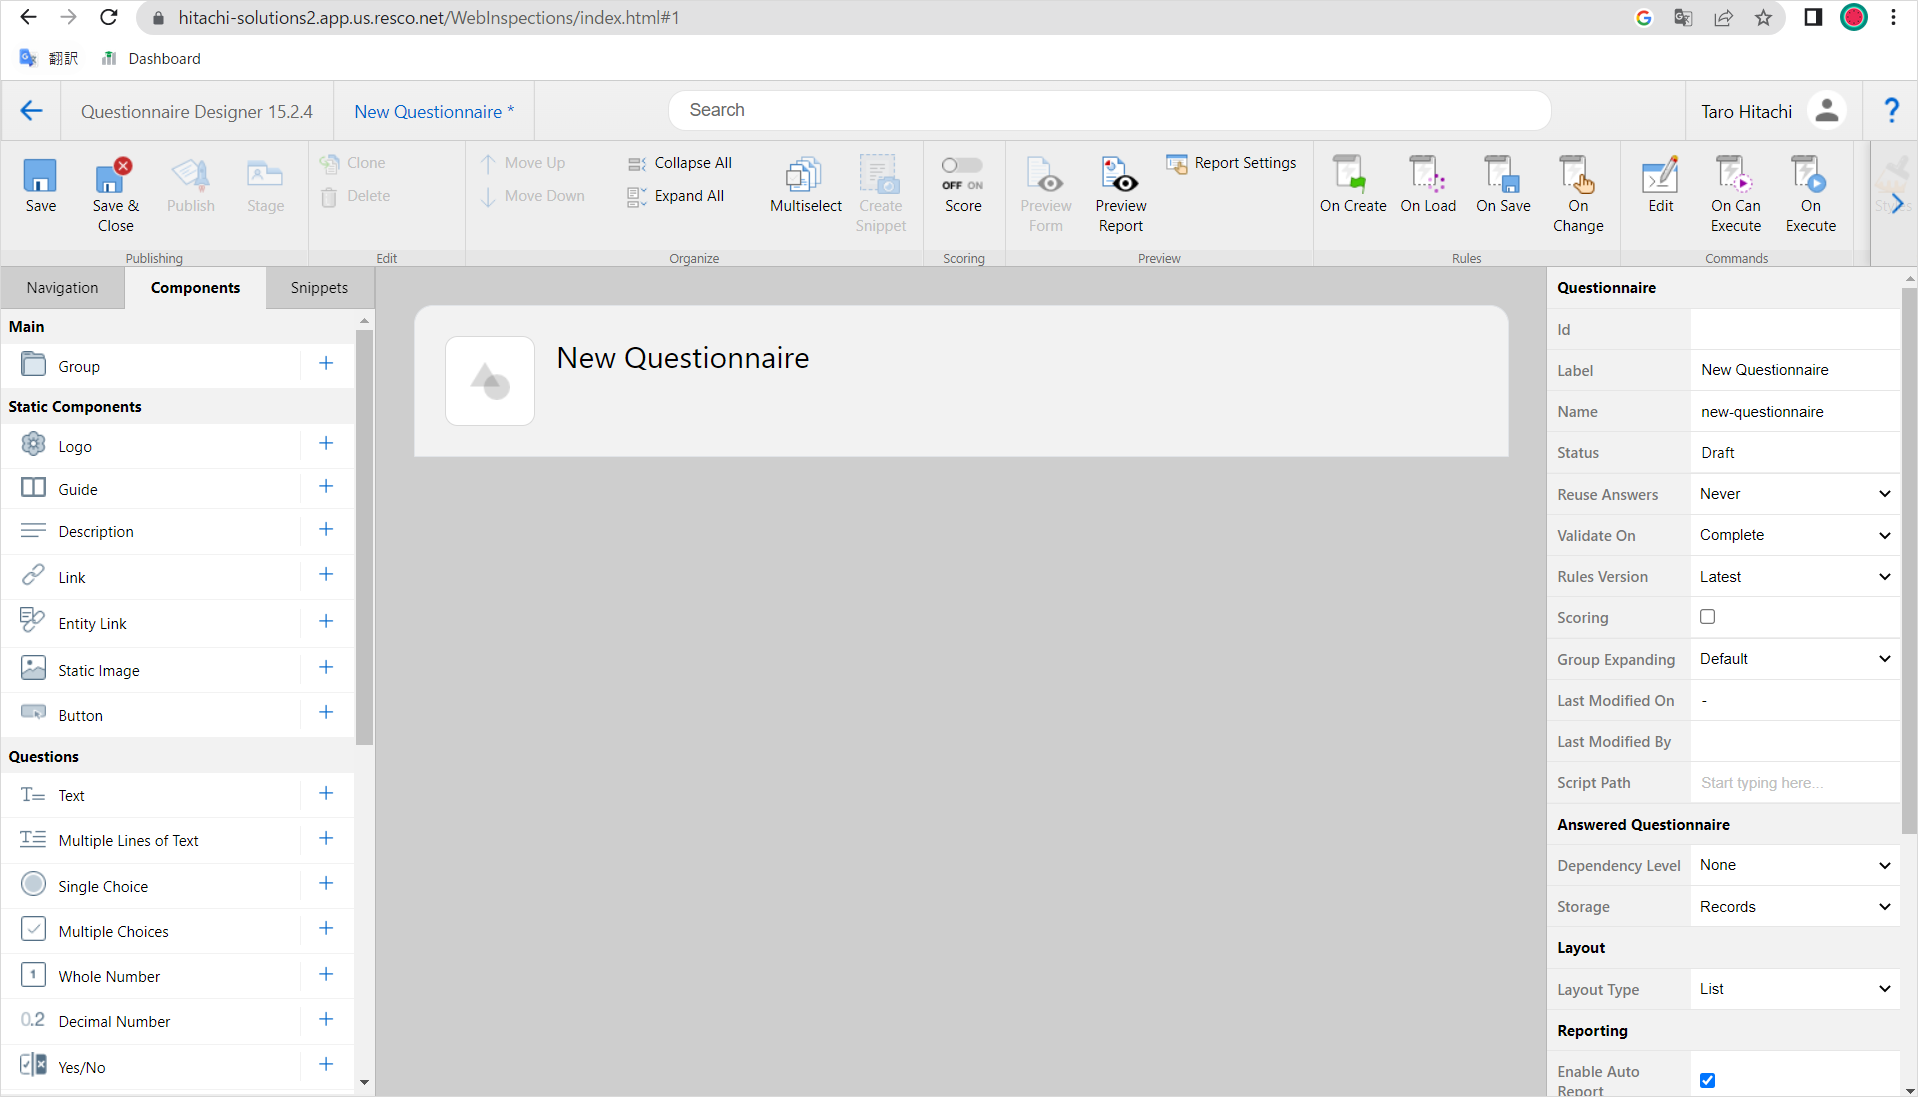
How to edit
First, let’s change the title of the checklist.
Double-click on the words “New Questionnaire” to edit the text.
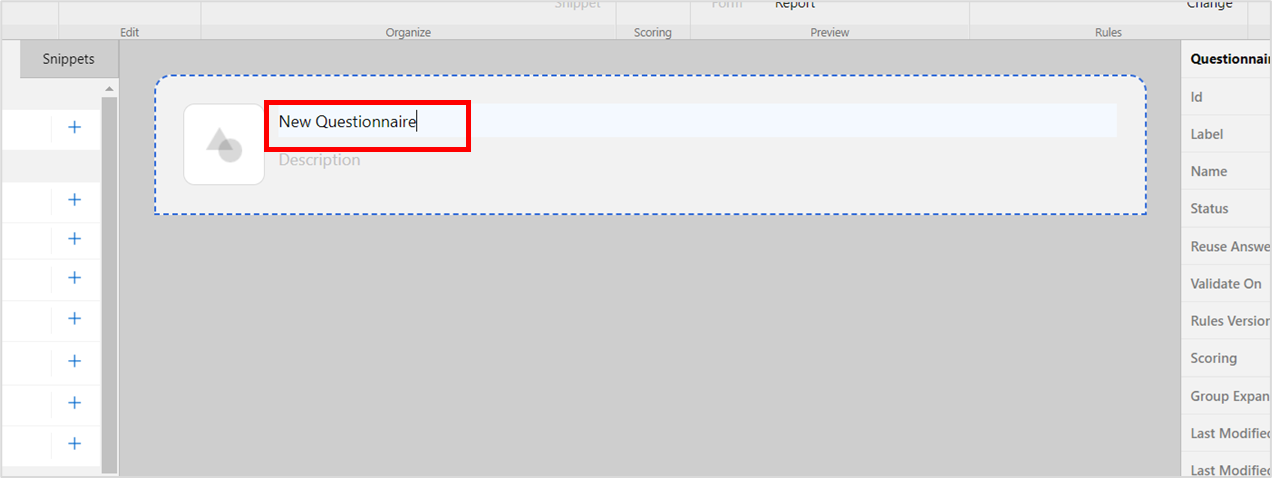
Then, add the components of the checklist.
Parts can be selected from the list on the left.
Types of the components
Static Components: Items that cannot be edited by respondents. You can add images, descriptions, links, etc.
Questions: Items that respondents can enter values for. You can add questions in a variety of formats, including text, multiple choices, numbers, dates, images, etc.
Group: Group multiple items together. This is useful when you want to separate checklists for easier viewing or when you want to enter the same question repeatedly.
Hover over each item and click ‘More Info…’ in the displayed message to go to the Resco Wiki (English site) for a detailed explanation.
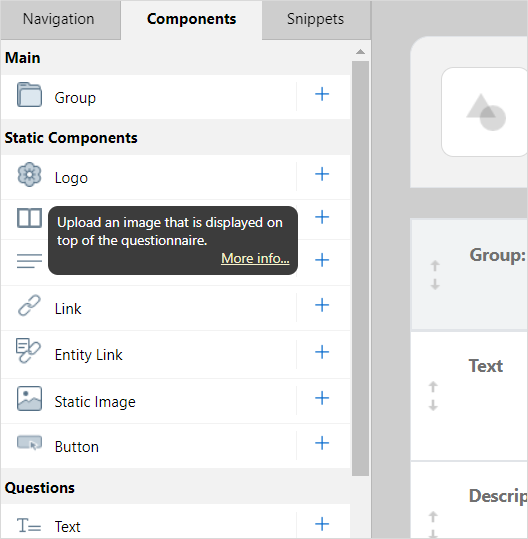
Let’s add an item to be answered in text format.
- Click ‘Text’ in the list on the left
- A Text item will be added in the center. Edit the value as you like
- Text: Enter the text of the question
- Add Description: Enter a supplementary description of the question
- Default value: Enter the initial value of the answer
- Maximum Length: Specify the maximum length of the answer
Once entered, click the ‘Save’ button in the upper left corner of the screen to save the data.
Click ‘Preview Form’ on the toolbar at the top of the screen to preview the saved checklist.
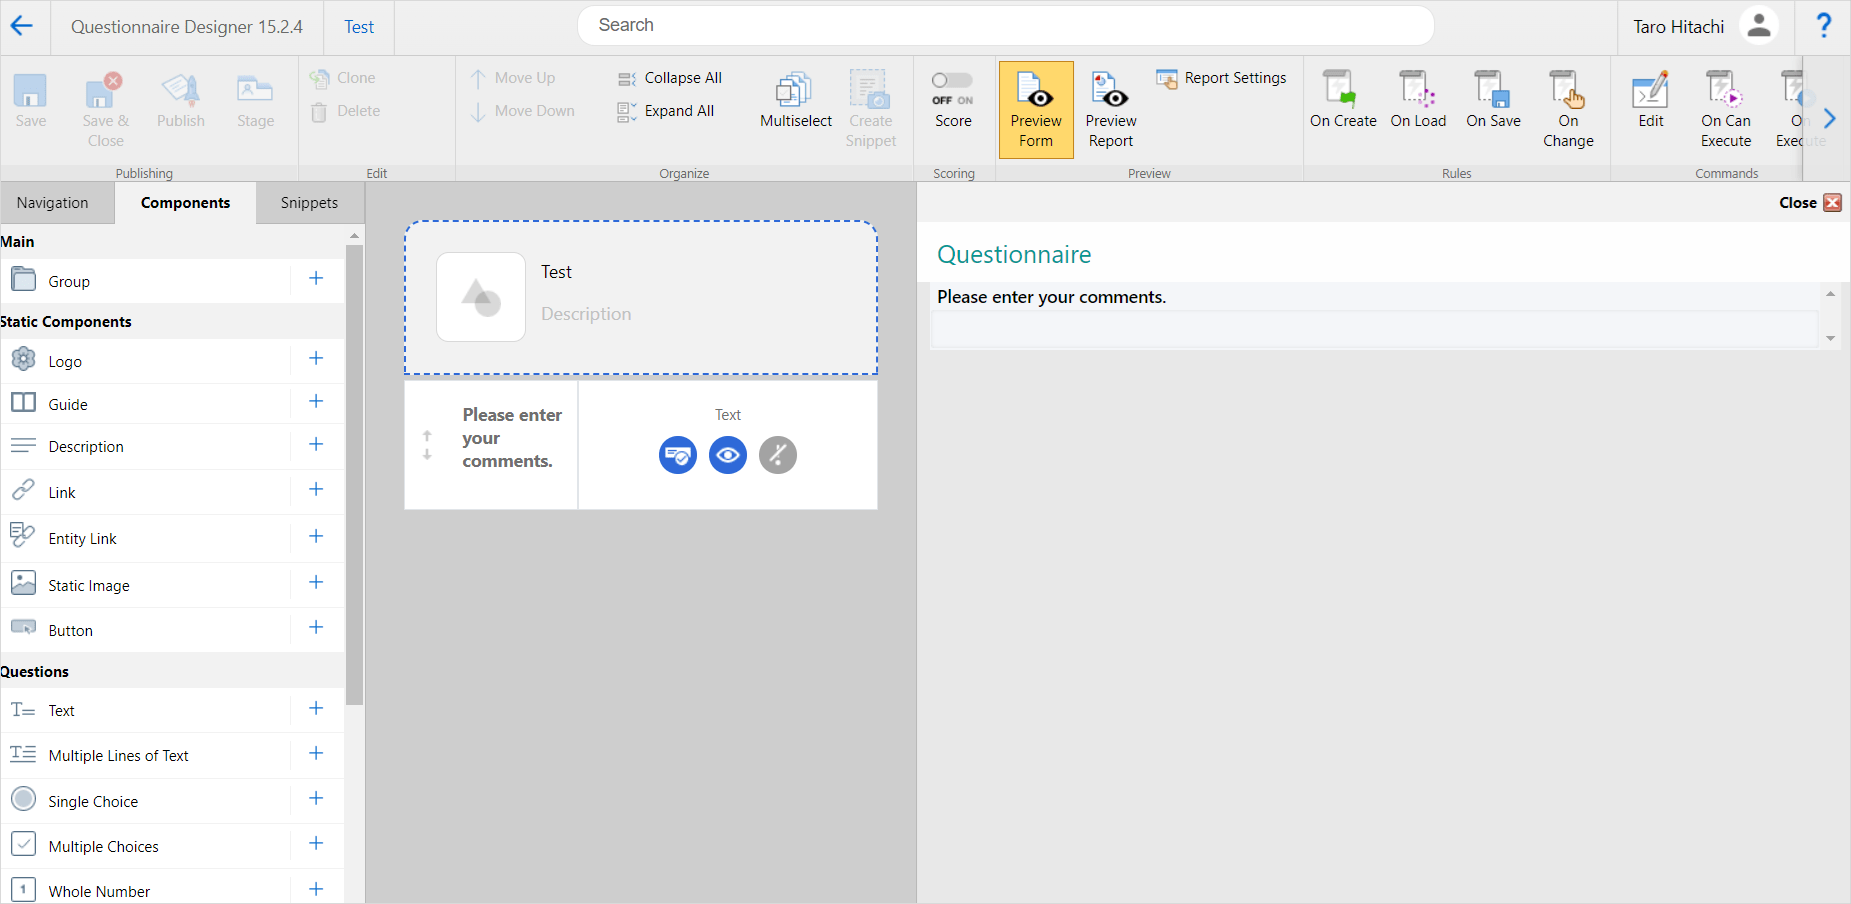
Follow the same procedure to add items of your choice to the checklist and save.
When you have finished editing, click ‘Save & Close’ in the upper left corner of the screen to close the editing screen.
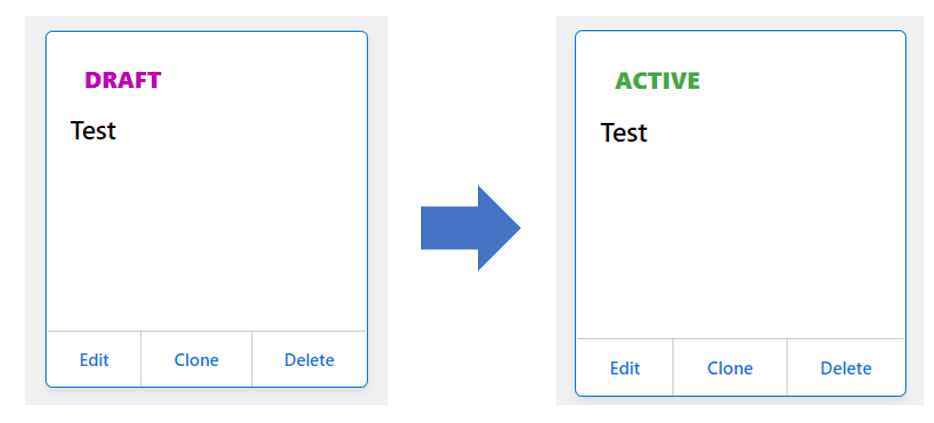
The checklist you created is displayed in the center of the screen. Click to select it and click ‘Activate’ on the toolbar.
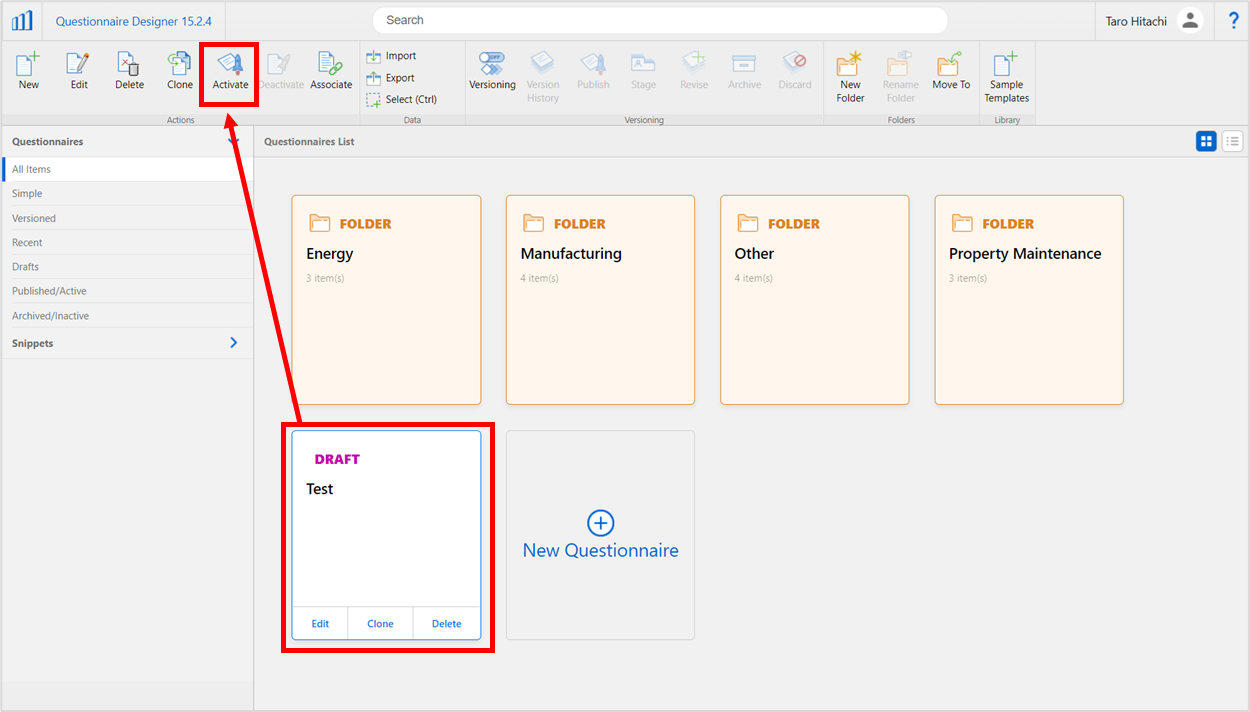
The status of the checklist will change from ‘DRAFT’ to ‘ACTIVE’, allowing users to answer from their mobile apps.
Step 2. Answer the checklist
Open and answer the checklist in the Inspections+ mobile app.
First, launch the app.
The quick introduction screen will appear.
After reading the function introduction screen, the login screen will appear.
Enter the following information:
- User Mode = Standard User
- URL = URL of the environment *URL that was included in the e-mail you received when you acquired the trial environment.
(Example: https://[environment name].app.[us or eu].resco.net/)
- Username, Password = email address and password you registered when you obtained the trial environment
- Save Password = ON
After entering the information, click the ‘Sync’ button in the upper right corner. After a short wait, the application selection screen will open.
Select ‘Inspector’.
The home screen for field workers will open.
Select ‘Templates’ from the home screen.
You will see a list of checklists that you can answer. Scroll down and you will find the checklists created in the previous step. Other checklists are data for demonstration purposes.
For example, “Quality Assurance” is a checklist you can try.
Open the checklist you created.
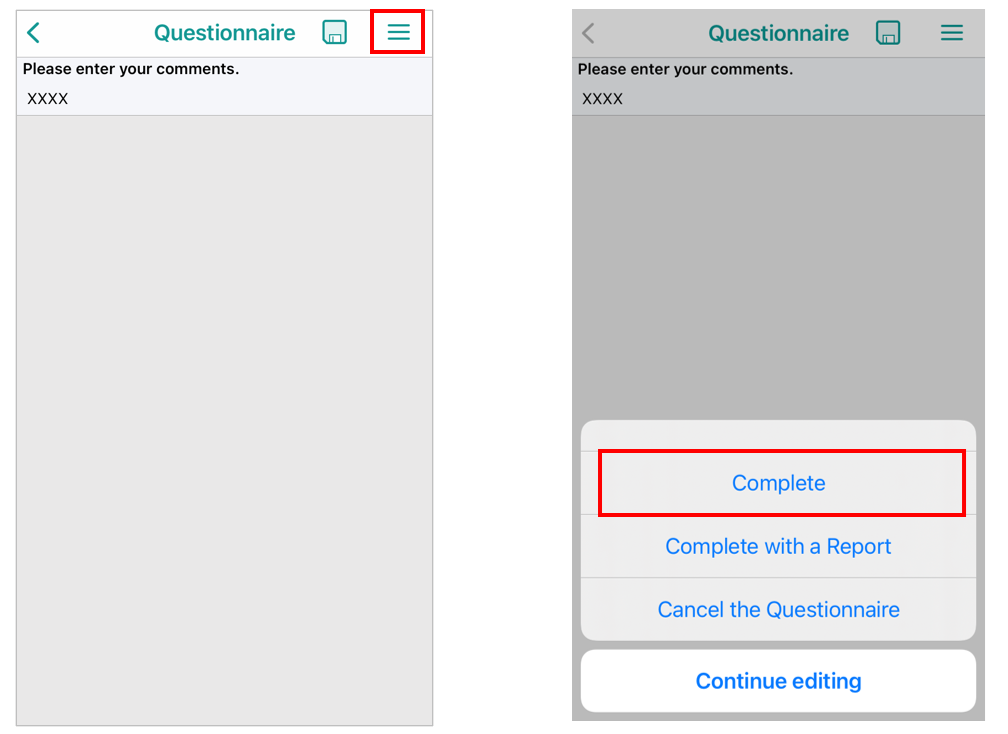
Enter your answers and click the hamburger button (三) in the upper right corner. Select ‘Complete’.
You can also try our product tours to see how the Questionnaire Designer and Inspections+ mobile app work in your browser without installing any software.
Step 3: Check the results of the answered checklist
In Inspections+, you can view and export the results of the answered checklists in the Results Viewer.
Select ‘Results Viewer’ in the center of the Inspections+ screen.
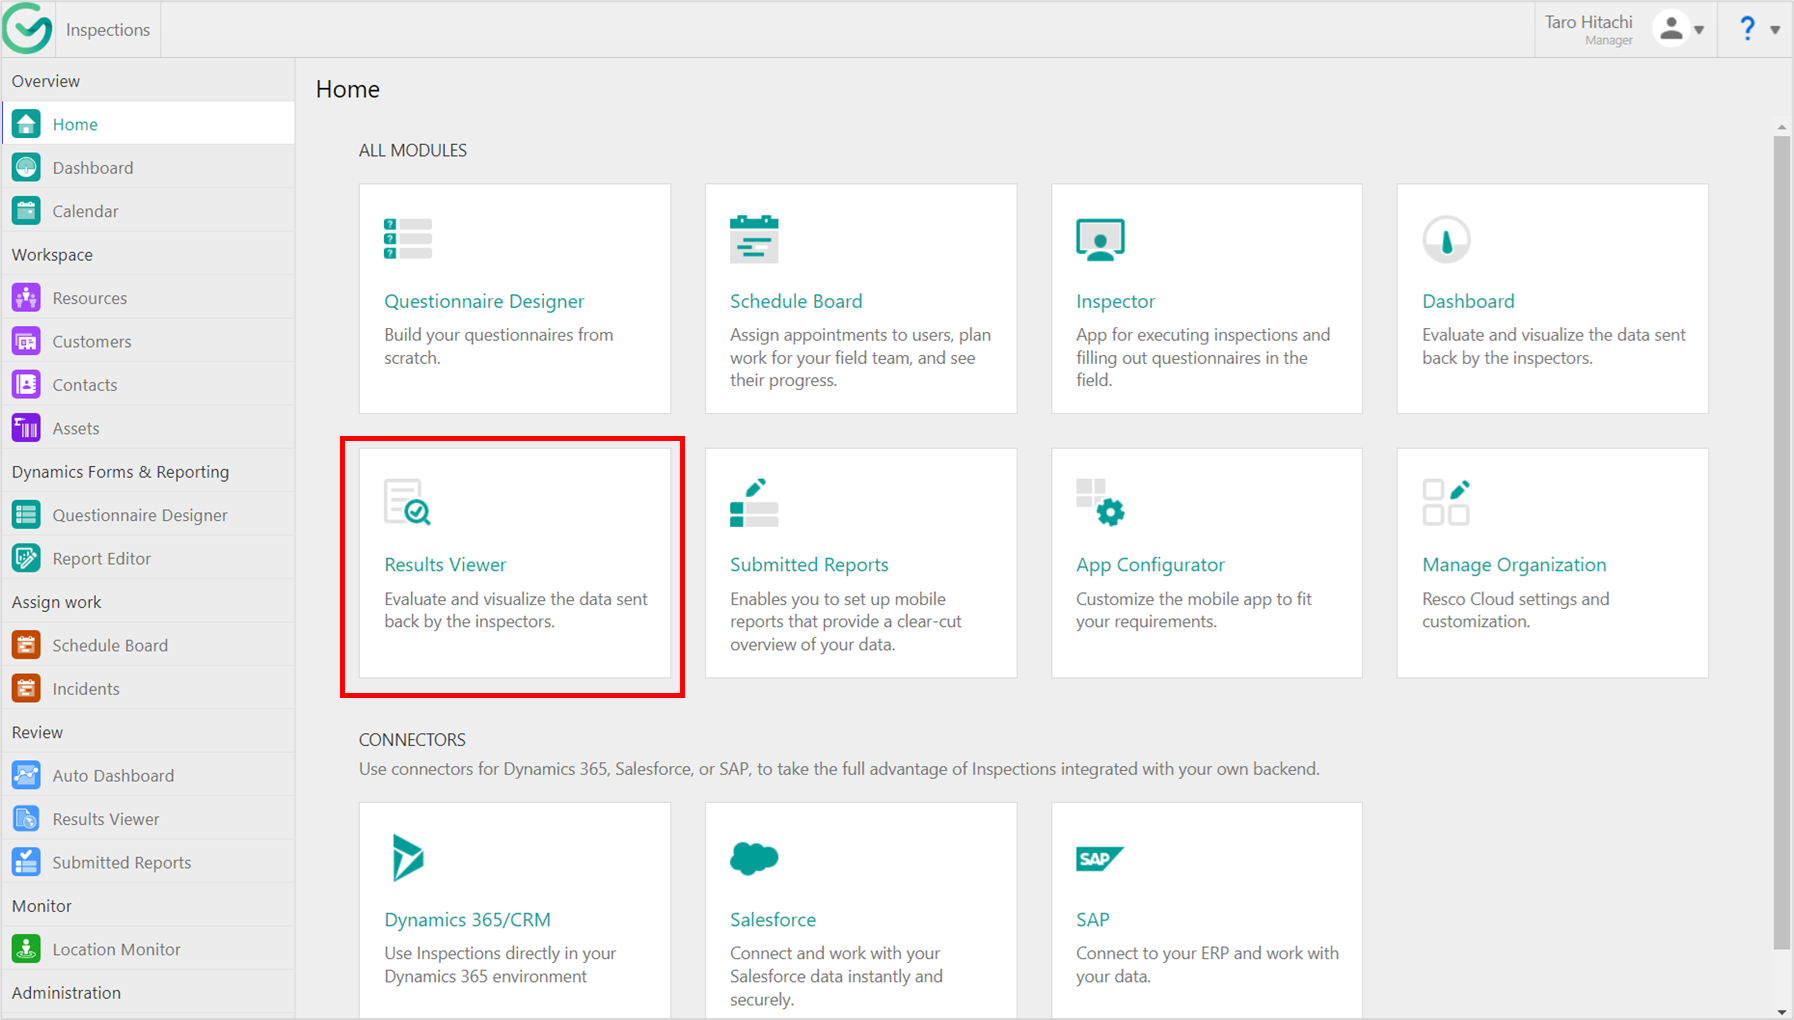
The Results Viewer will be launched.
A list of checklists that have been answered is displayed in the center of the screen.
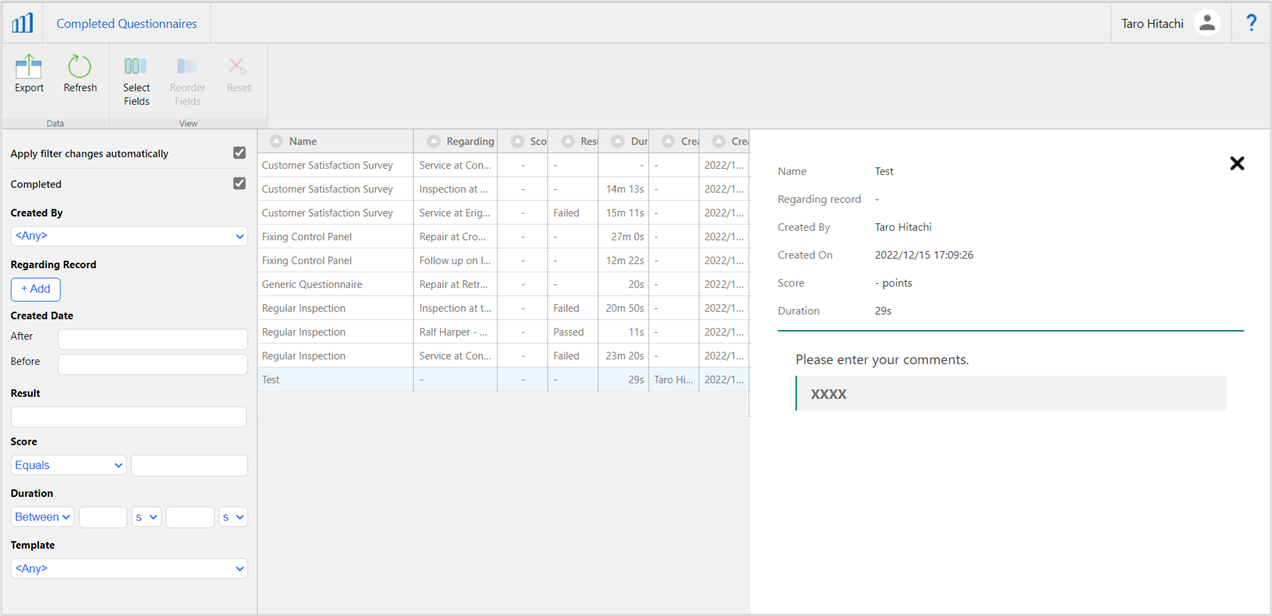
Select one of the checklists, and the results of your answer will be displayed on the right side of the screen.
The menu on the left side of the screen allows you to filter the results. Also, select the ‘Export’ button at the top of the screen to export the response results data.
This completes the basic operation of Resco Inspections+.
More information about how to use Inspections+
Looking for more information? Watch a webinar on how to create a good questionnaire.
